A Comprehensive Guide to Floor Shield Oregon & SW Washington: Cost and Installation Process

This guide covers the key aspects of Floor Shield’s costs, benefits, and installation process, helping you make an informed decision.
Why Invest in Floor Shield Oregon & SW Washington?
Protecting your home’s flooring is a smart investment. Not only does it help with the aesthetics of your project, it also protects the concrete over a long period of time.
Homeowners often ask, “How much does it cost to coat my floor?” and “What exactly am I paying for?” At Floor Shield Oregon & SW Washington, we provide transparency to help you make a confident decision.
Comparing Costs: Floor Shield Oregon & SW Washington vs. Other Options
Before diving into costs, it’s important to understand the different coating options available:
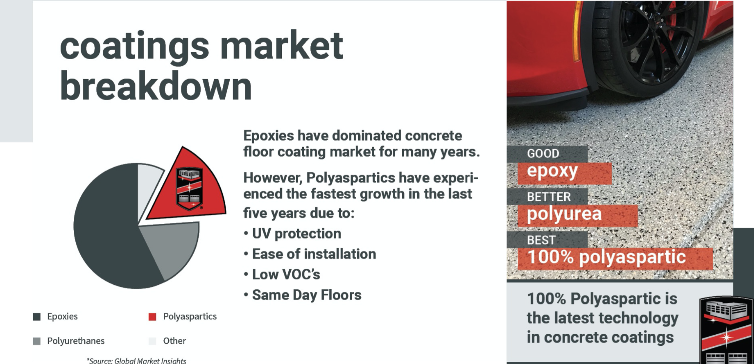
Epoxies
- Pros: Great adhesion for high moisture concrete pads, lower cost “budget friendly”, versatile applications.
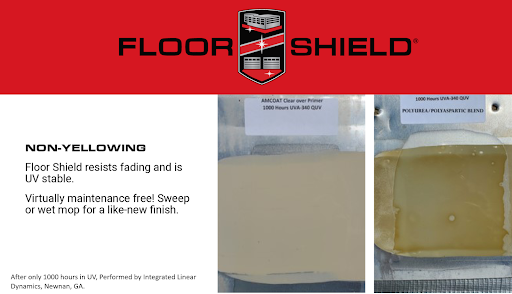
- Cons: Multi-day installation, UV instability (will yellow), strong odor, hot tire pickup, turns hard and brittle over time.
Polyurea
- Pros: Faster installation (one day), mid-range price, low odor.
- Cons: Not all Polyureas are UV-stable, 40% less adhesion compared to Floor Shield Polyaspartic.
Polyaspartics (Floor Shield Product)
- Pros: Quick installation (8 hours), 100% UV stable (no yellowing), zero VOCs, superior adhesion.
- Cons: Higher initial cost.
Cost Comparison
- Floor Shield Polyaspartic: $6.50 to $7.50 per square foot (garages) outdoor/commercial $7.00 to $10 per square foot.
- Traditional Epoxy: $5.50 to $10 per square foot.
- Polyurea: $6.50 to $8 per square foot.
Factors Influencing Price
- Floor condition (cracks, spalling and minor leveling)
- Labor costs
- Square footage
- Surface leveling needs
- Moisture levels
Floor Shield Advantages
- UV stability
- Anti-slip properties
- Exceptional durability and adhesion
- Same-day installation
- Low VOCs
- Variety of colors and flakes
Long-Term Value: Although the initial cost may be higher, Floor Shield’s durability and UV resistance can lead to savings over time.
DIY vs. Professional Installation
While DIY might save money upfront, professional installation ensures:
- High-quality application
- Avoidance of common issues such as adhesion problems, accidentally mix product incorrectly which can cause the product to never dry and stay sticky.
- Use of industrial-grade products
The Installation Process

Floor Testing
- Assess hardness and moisture levels.
- Conduct Mohs test and use a moisture meter.
Surface Protection
- Protect surrounding areas from spills with materials like Ram Board.
Crack Patching
- Patch cracks to ensure a smooth surface.
Concrete Grinding
- Grind to achieve an even surface and enhance adhesion.
Dust Removal
- Remove dust and particles for proper adhesion.
Moisture and Softness Mitigation
- Harden soft concrete and apply moisture-vapor barrier if needed.
Color Coat Application
- Apply the base color.
Flake Application
- Broadcast flakes for added protection and aesthetics.
Clear Coat Finish
- Apply a glossy, protective clear coat.
Clean-up
- Leave the work area cleaner than before.
Warranty and Additional Information
- Warranty: 15-year non-prorated, labor warranty.
- Downpayment: Approximately 30%.
- Discounts: May be available.
- Manufacturing: 100% U.S.-made.